5 Learnings from Deploying to Sitecore Managed Cloud for Containers
On a recent project I had the opportunity to work with Sitecore's Managed Cloud for Containers service for a Sitecore solution based on JSS and Next.js. In this blog post I will provide some insights and learnings we made during the setup and customization of the environment.

On a recent project I had the opportunity to work with Sitecore's Managed Cloud for Containers service for a Sitecore solution based on JSS and Next.js. In this blog post I will provide some insights and learnings we made during the setup and customization of the environment.
Automating Deployments to the Managed Cloud for Containers (MCC)
One of the first questions that arise while working with MCC is: "how are we going to automate our deployments?". In our case, we had the Git repositories and build pipelines in a customer-specific Azure DevOps organization, while everything related to the Managed Cloud is hosted in Sitecore's own ADO organization and project. Somehow, we needed to integrate the AKS deployments into the existing release processes.
We have identified two possible approaches to make this work:
- Using the Azure CLI, invoke the
Restart Sitecore Deploymentspipeline. - Automated the steps that are required to update to trigger the
Applicationpipeline.
While the first option seems to be the way to go initially, it has some caveats. The pipeline does not take any parameters that would allow us to define which Docker image (including the version) should be deployed. It only allows us to define which Kubernetes Deployments should be restarted (CM, CD and ID by default). Due to that, the only option would be to always reference a stable Docker tag in the docker-images.json file, such as latest. Taking into account Microsoft's recommendations for tagging and versioning container images, we decided against this approach, as we wanted to have deliberate deployments of a consistent version and prevent version inconsistencies that might arise during scaling and deployment scenarios.
This leaves us with option 2. As a recap, the following steps are needed to trigger a deployment of a new image version to Managed Cloud (this assumes that your custom Docker images have been made available in the MCC's ACR):
- Clone the Managed Cloud Application repository for the environment that you want to update.
- Create a new branch.
- Update the
docker-images.jsonfile: Adapt the image version references accordingly. For example"cm": "<your-mcc-id>.azurecr.io/contentmanagement:1.7.3". - Commit the changes and push the branch to remote.
- Create a pull request in the MCC repository targeting
main. - Approve the pull request.
- Merge the pull request.
After merging the branch, the Application pipeline will be triggered automatically and invoke the Ansible roles required to update the desired state in K8s.
To automate these steps, we created a PowerShell script that will be invoked from the pipeline:
# Azure DevOps definitions
$newBranchName = "${{ parameters.smcNewBranchPrefix }}${{ parameters.imageTag }}"
$commitMessage = "Update image tags to ${{ parameters.imageTag }}"
$prDescription = $commitMessage
$prTitle = $commitMessage

$pathToDockerImagesConfig = "./config/docker-images"
$dockerImagesConfigFileName = "docker-images.json"
$templateName = "docker-images-template.json"

if (Test-Path -Path ".\${{ parameters.smcApplicationGitRepoName }}") {
    Write-Host "Removing existing application git checkout directory"
    Remove-Item ".\${{ parameters.smcApplicationGitRepoName }}" -Recurse -Force
}

git clone "https://${{ parameters.smcAdoPat }}@${{ parameters.smcApplicationGitRepoUrl }}"
Push-Location "${{ parameters.smcApplicationGitRepoName }}"

# Set git username and email
Write-Output "Setting git settings for email and name"
git config user.email "<some-email>"
git config user.name "<some-username>"

Write-Output "Creating new branch for release"
git pull
git checkout "${{ parameters.smcTargetBranch }}"

# Create the new branch
git checkout -b $newBranchName

Write-Output "Updating docker images config json"
Push-Location $pathToDockerImagesConfig
((Get-Content -path $templateName -Raw) -replace "{imageTag}","${{ parameters.imageTag }}") | Set-Content -Path $dockerImagesConfigFileName

Write-Output "New docker images config json is:"
cat $dockerImagesConfigFileName

# Add and commit changes
Write-Output "Committing changes"
git add --all
git commit -m $commitMessage

# Push changes
Write-Output "Pushing to target repository"
git push -u origin $newBranchName

# Create the Pull Request and retrieve its ID
Write-Output "Creating Pull Request on target repository"
$prId = az repos pr create --auto-complete "${{ parameters.smcPrAutoComplete }}" `
            --delete-source-branch "${{ parameters.smcPrDeleteSourceBranch }}" `
            --description $prDescription `
            --repository "${{ parameters.smcApplicationGitRepoName }}" `
            --source-branch $newBranchName `
            --target-branch "${{ parameters.smcTargetBranch }}" `
            --title $prTitle `
            --query codeReviewId -o json `
            --org ${{ parameters.smcAdoOrganization }} `
            --project ${{ parameters.smcAdoProject }}

Write-Host "Created PR ID is $prId"

# Self-approve the Pull Request
Write-Output "Self-approving PR"
az repos pr set-vote --id $prId --vote approve --org ${{ parameters.smcAdoOrganization }}
The image version definition is accomplished by having a tokenized template file, which we called docker-images-template.json. This file has been placed in the same folder as the original docker-images.json and looks as follows:
{
    "sitecore": {
        "cm": "<your-mcc-id>.azurecr.io/contentmanagement:{imageTag}",
        "cd": "<your-mcc-id>.azurecr.io/contentdelivery:{imageTag}",
        "id": "scr.sitecore.com/sxp/sitecore-id:10.1.1-ltsc2019",
        "prc": "scr.sitecore.com/sxp/sitecore-xp1-prc:10.1.1-ltsc2019",
<snip>
}
This script has been placed in a template and parameterized with Azure DevOps pipeline parameters, allowing for easy re-use when multiple environments are part of the release cycle.
Note that for this to work, you will need to have a personal access token for Sitecore's Managed Cloud project. The user account, used to generate the PAT will need to have enough permissions to perform the listed Git operations and additionally needs to be able to self-approve pull requests.
In order to use the Azure CLI DevOps extension with the PAT, a step had to be added within the ADO pipeline before invoking the custom PowerShell script:
- script: echo %AZURE_DEVOPS_CLI_PAT% | az devops login
    env:
    AZURE_DEVOPS_CLI_PAT: ${{ parameters.smcAdoPat }}
    displayName: 'Login Azure DevOps Extension'
Introducing the JSS/Next.js Rendering Host to Sitecore Managed Cloud
Introducing a custom role to the Managed Cloud setup involves a few steps. For our approach, we wanted to have a clear separation between the default sitecore-xp Ansible roles and our additions to reduce possible conflicts when upgrading the Managed Cloud repositories to newer versions. For this, we introduced a new <customer>-xp Ansible role under application\roles. This role is then referenced from application\main.yaml.
The role is set up as follows:
<customer>-xp
├─ defaults
│  ├─ main.yaml
├─ tasks
│  ├─ init.yaml
│  ├─ main.yaml
├─ templates
│  ├─ external-services
│  │  ├─ external-services.yaml
│  │  ├─ kustomization.yaml
│  ├─ ingress
│  │  ├─ ingress.yaml
│  │  ├─ kustomization.yaml
│  ├─ init
│  │  ├─ kustomization.yaml
│  │  ├─ mssql-init-jss.yaml
│  ├─ rendering
│  │  ├─ kustomization.yaml
│  │  ├─ rendering.yaml
│  ├─ resources
│  │  ├─ resources-rendering.yaml
Since this structure strongly resembles the out-of-the-box sitecore-xp role, I won't go too much into details here. However, some things to note are:
The external-services.yaml is responsible for introducing the Kubernetes service definition which will be referenced by the custom Ingress definition that is needed to expose the Rendering Host:
kind: Service
apiVersion: v1
metadata:
  name: rendering-external
spec:
  type: ExternalName
  externalName: rendering.{{ solution_id }}.svc.cluster.local
  ports:
  - port: 80
Where ingress.yaml is defined as:
apiVersion: extensions/v1beta1
kind: Ingress
metadata:
  name: sitecore-rendering-ingress
  annotations:
    kubernetes.io/ingress.class: "nginx"
    nginx.ingress.kubernetes.io/force-ssl-redirect: "false"
    nginx.ingress.kubernetes.io/rewrite-target: /
spec:
  rules:
  - host: "rendering.sitecore"
    http:
      paths:
      - path: /
        backend:
          serviceName: rendering-external
          servicePort: 80
To be in-line with Sitecore's approach of defining image versions, replicas and resource requests/limits, both config\docker-images\docker-images.json and config\resources\resources.json have been extended with a corresponding rendering node. These values will then be used as part of the custom Ansible role, for example within resources-rendering.yaml:
---
apiVersion: apps/v1
kind: Deployment
metadata:
  name: rendering
spec:
  replicas: {{ rendering_replicas }}
  template:
    spec:
      containers:
      - name: rendering
        image: "{{ docker_images.sitecore.rendering }}"
        resources:
          requests:
            memory: {{ rendering_request_memory }}
            cpu: {{ rendering_request_cpu }}
          limits:
            memory: {{ rendering_limit_memory }}
            cpu: {{ rendering_limit_cpu }}
Automatically Provision Custom Grafana Dashboards
As part of the Managed Cloud environment, Sitecore will provide a handy Grafana instance containing several dashboards displaying information about the entire AKS cluster and the services running within it. Since we have added the custom rendering host, we wanted to have insights into its request statistics.
For this, we first created a new dashboard within Grafana manually and defined the following three panels:
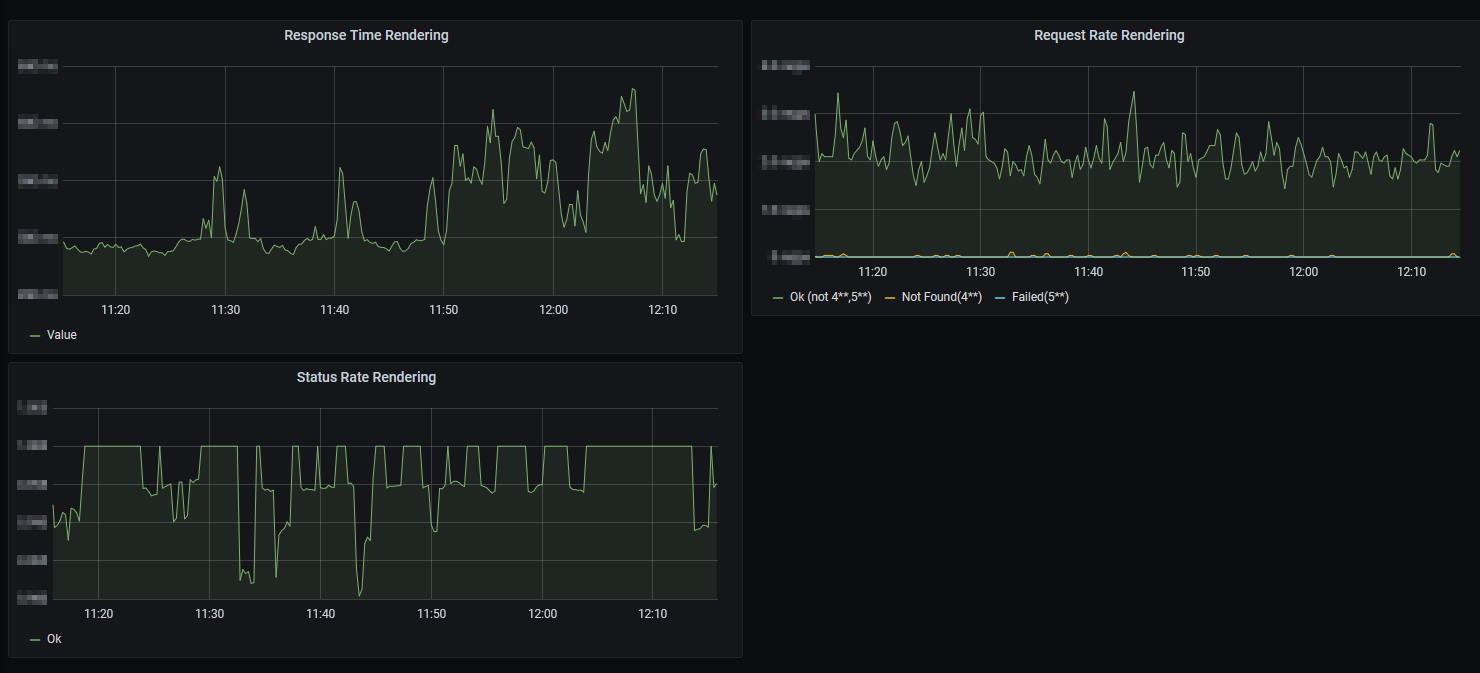
The panels are based on the ones that have been provided out-of-the-box by Sitecore in the Ingress Overview dashboard, with the queries adapted such that the correct Ingress instance is referenced. For example, the query for Response Time Rendering looks as follows:
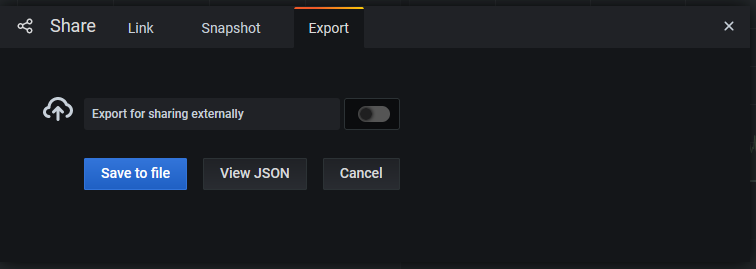
histogram_quantile(0.90, sum(rate(nginx_ingress_controller_request_duration_seconds_bucket{ingress =~ "sitecore-rendering-ingress"}[5m])) by (le))Once the custom dashboard has been set up, it can be exported as JSON and then deleted. Make sure that during the export, you keep Export for sharing externally deselected:
The JSON can then be placed in the MCC's Application repository under grafana-dashboards and will be provisioned automatically to Grafana when the Application pipeline is being executed.
Performing AKS Upgrades or: How I Learned to Stop Worrying and Love the Bomb
Microsoft's Support Cycle for AKS is rather strict, requiring you to keep up with the AKS cluster version to be fully supported. While this might seem like a daunting task at first, it can be a relatively straight-forward process. Sitecore provides a pipeline that can be used to automate the entire upgrade, called Cluster Version Upgrade. The pipeline accepts a single parameter, kubernetes_version, where you define which AKS Version you want to upgrade to. Note that you can only upgrade to the next minor version, for example (taken from the linked Microsoft article):
- 1.12.x -> 1.13.x: allowed.
- 1.13.x -> 1.14.x: allowed.
- 1.12.x -> 1.14.x: not allowed.
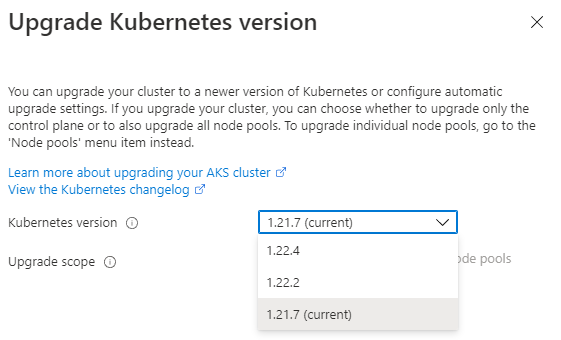
To see which upgrades are available, I recommend opening the Azure portal and navigate to the AKS resource. There, you can select the current version, which will allow you to click Upgrade version. The dropdown in the overlay will then show all available/allowed versions:
Once the version is identified, I recommend making yourself familiar with the script that will be executed by the Pipeline. It can be found at the following location in the Infrastructure Repository: infrastructure\pipelines\scripts\cluster-version-upgrade.ps1 and references infrastructure\pipelines\scripts\nodepool-common.ps1
In a nutshell, the following sequence of steps will be performed:
- Upgrade the control plane
- Run
az aks nodepool upgradefor every Linux node pool within the cluster - For every Windows node pool, a temporary node pool will be provisioned with the old version. The original node pool will then be cordoned and drained. All deployments will be restarted on the temporary node. Once the upgrade finishes, the temporary node will be cordoned and drained, resulting in a restart of the deployments. Once drained, the temporary node will be deleted.
It helps to get admin permissions on the cluster to be able to intervene and manually complete the steps if anything would go awry.
One thing to keep an eye on is the duration of the upgrade. On our environment we have observed upgrade times to be around 2-3 hours for one cluster. By default, the timeoutInMinutes in /pipelines/cluster-version-upgrade.yaml is set to 120 minutes. If the upgrade exceeds this definition, the pipeline will be automatically cancelled by Azure DevOps, resulting in an incomplete upgrade. To be sure we can fully perform the upgrade, we have increased this timeout to 300 minutes.
Lens, But the One for Kubernetes
Once you start working with Kubernetes, you might feel the need to get an understanding of what is actually going on in your cluster. I have found Lens to be a really useful tool to monitor deployments and perform ad-hoc changes to the cluster.
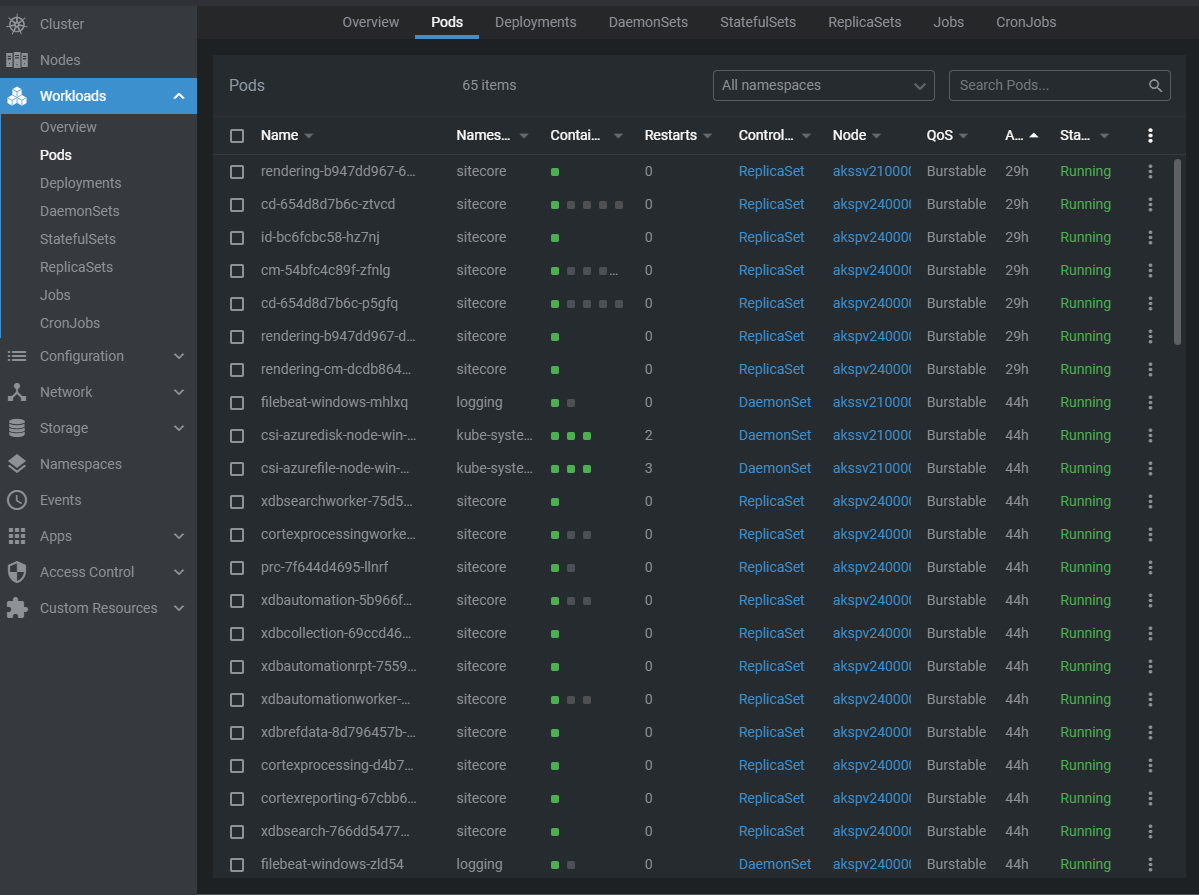
From this UI you can delete pods, shell into pods, check logs, restart and scale deployments, and much more. To connect to your cluster, you will need to provide the kubeconfig, which can be generated with the following command:
az aks get-credentials --resource-group <your-resource-group-name> --name <aks-resource-name> --file <output-file-path>You can also append --admin if you want to get the cluster admin credentials.
Persisting Front Door Rules Engine Assignments
We are leveraging Azure Front Door's Rules Engine feature to adapt HTTP responses. We have observed that after running the Front Door pipeline, the assignments of the Rules Engine to Routing Rules would be lost. This was a bug in the AzureRM Terraform provider until recently and has been fixed in version 2.85.0. To update the provider reference for Front Door, the frontdoor\main.tf file needs to be adapted:
terraform {
  backend "azurerm" {
  }
  required_providers {
    local = {
      source  = "hashicorp/local"
      version = "~> 2.0.0"
    }
    azurerm = {
      source  = "hashicorp/azurerm"
      version = "~> 2.85.0" # Up from 2.64.0
    }
  }
}
Bonus: When CD is Content Delivery and CM is Cameroon Telecommunications
While setting up the Horizon service, we observed that it couldn't communicate with Sitecore's Content Management instance. Upon further investigation we noticed that instead of resolving the cm service within the cluster, Horizon was using 195.24.205.60 for the connection and trying to invoke the Sitecore APIs on that IP. Doing a DNS lookup, we can see that cm is an A record registered for CAMTEL.
To solve this issue you can use the fully qualified domain name cm.<namespace>.svc.cluster.local instead, where <namespace> is the Kubernetes namespace your Content Management instance is running in, eg. sitecore.
Conclusion
Working with Sitecore's Managed Cloud for containers can be intimidating at first. There are a lot of moving parts contributing to the final picture: the provisioning mechanisms, several pipelines in Azure DevOps, the supporting Azure resources, the monitoring and alerting tools, frequent updates to the platform itself and, of course, AKS. We hope to have given you some insights on what some of the challenges are that you might face when bringing your solution to the MCC.
What are your learnings from working with the Managed Cloud? Did you face any roadblocks? And how did you automate your deployments? Feel free to reach out to us and let us know! You can find us on Twitter and LinkedIn.